
Teachers use Adobe PDF to print almost everything. As a teacher, I know you probably think that you spend way too much money on ink and paper. I know I do, but, what are you gonna do? In this post, I’ve put together 8 Adobe PDF printing tips and tricks for saving money (and time) using the built-in print settings. Just a note, I probably wouldn’t use some of these on graded work since I wouldn’t want a student’s lack of success to be associated with the size of the activity. Let’s get to it!
Tip #1: “I Have, Who Has?” Activities
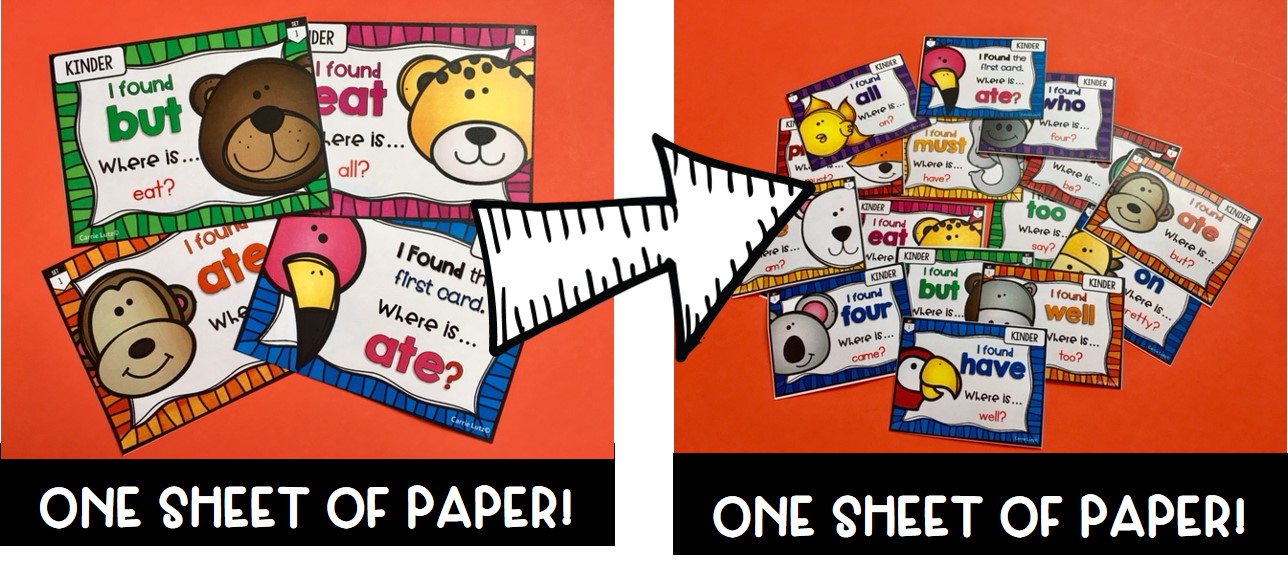
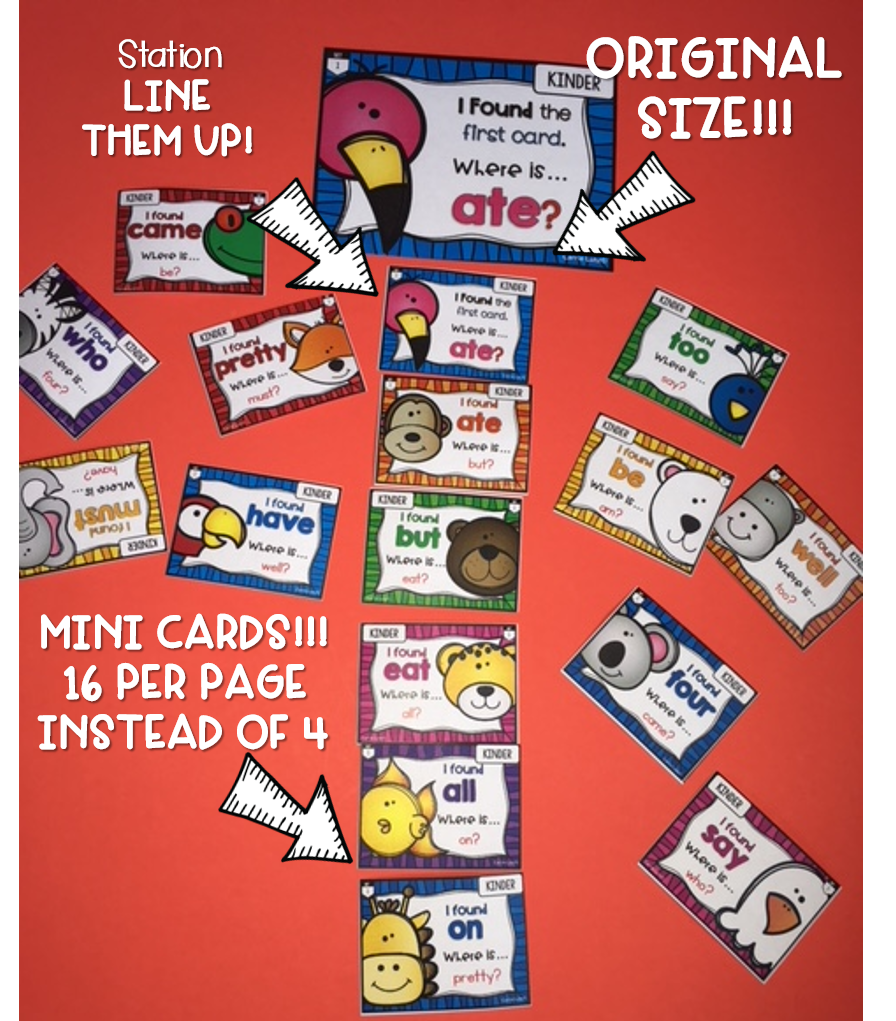
Usually, teachers create “I Have, Who Has” activities with 4 per page. But really, they don’t have to be that big. I have found that making them smaller, not only saves me ink, paper (and money), but the kids seem to LOVE the smaller cards. Check out the pics below of how you can turn an “I Have, Who Has?” activity into a station activity.
After doing the “I Have, Who Has” activity with the entire class, it can be moved into a center/station. The cards are small that they won’t take up much space. Kids can line them up until they come to the last card. They love this! It can be done independently or with a partner/group.
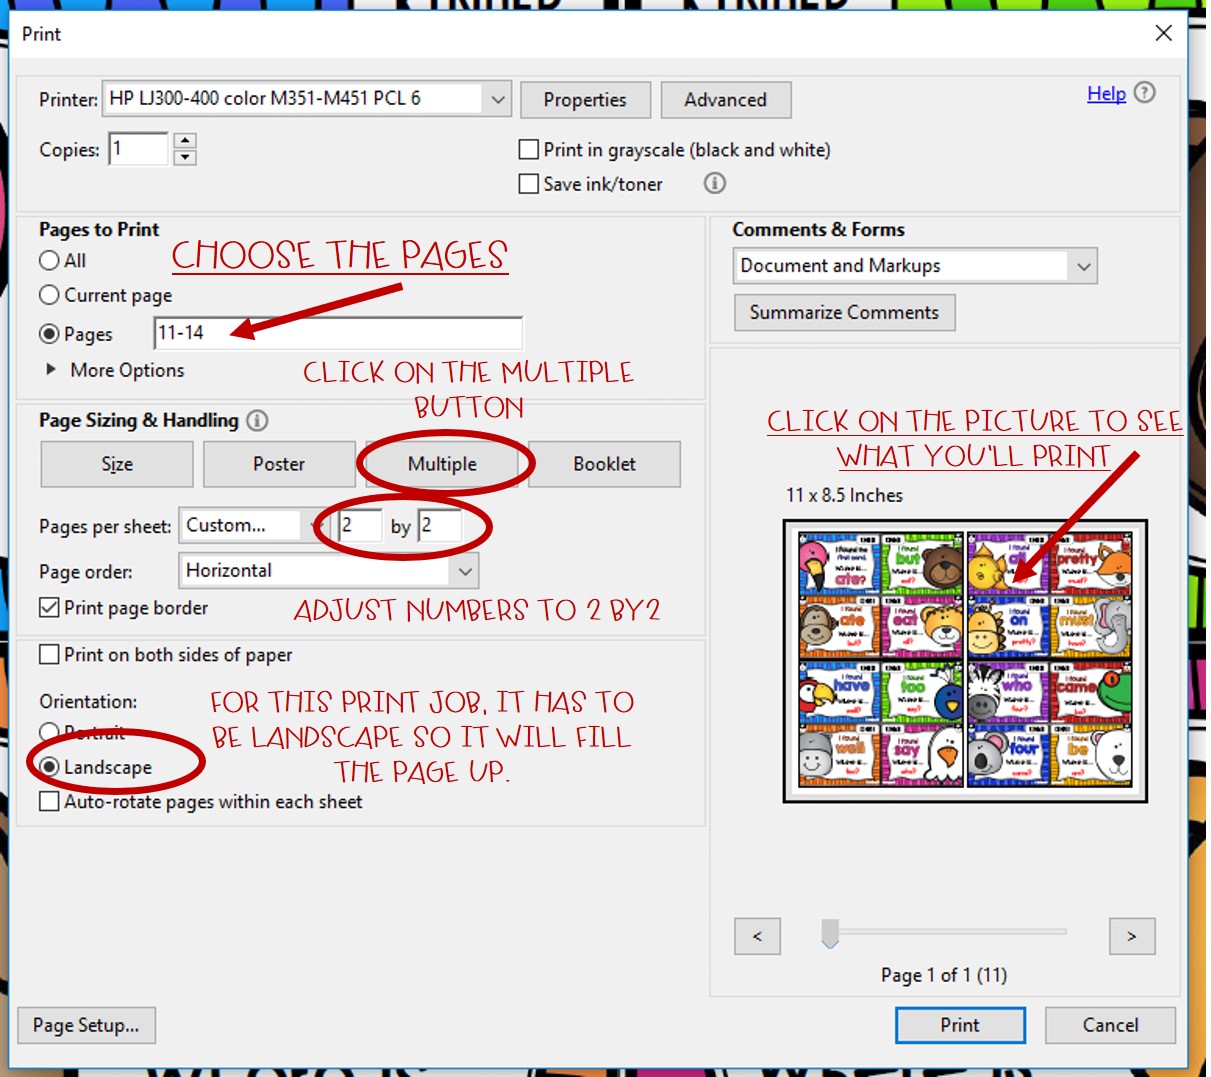
Below are the Adobe PDF print settings that I used to make these cute little cards.

Tip #2: Booklets
This year our school was being a little stingy with paper (hashtag eye roll…lol). I wanted to make a fun booklet for my students but I didn’t want to get busted for using a bunch of paper. Instead of full-size booklets, I re-sized them and used a fraction of the paper – voila, mini booklets! Here how I did it…

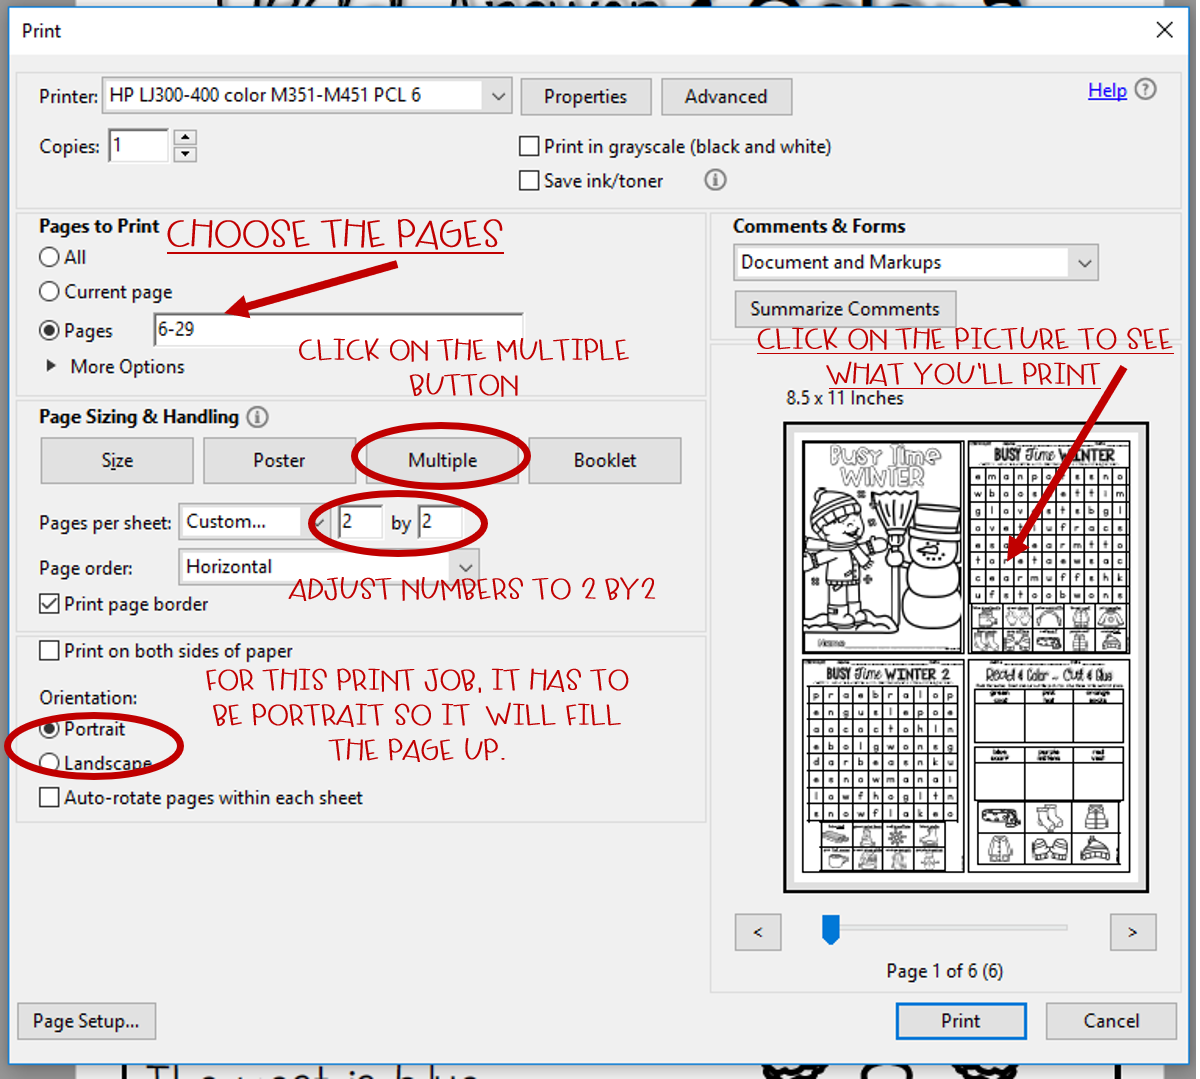
Below are the Adobe PDF print settings that I used to make these mini books. Since this booklet features cut and paste activities, I had to make them single sided. If your booklet doesn’t have cut and paste, you would use even less than this. You could also make the booklets half sheets instead of quarter sheets.

Tip #3: Task Cards
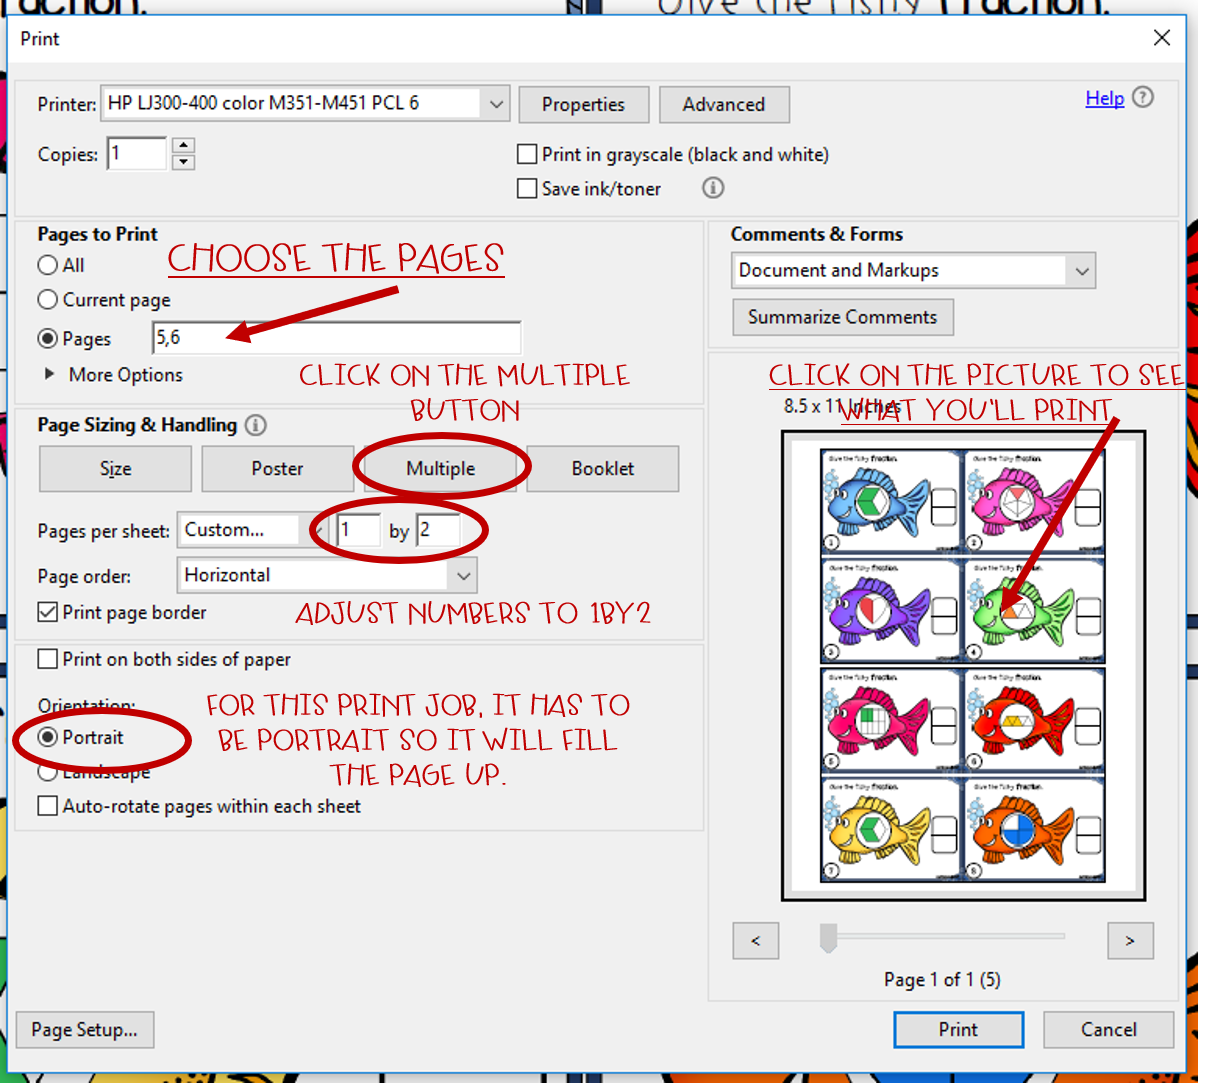
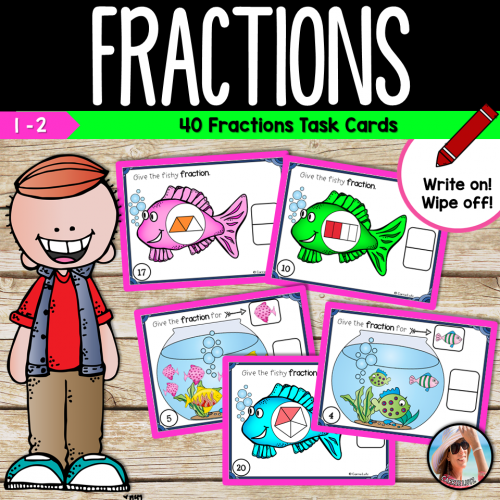
Task Cards really don’t need to be as big as they usually are. You can save on card stock and ink by simply using this Adobe printing tip below to make them smaller. Here is a set that I scaled down to half the size, and they are still big enough for students to write on with their dry erase marker.

Here are the print settings I used to make these HALF as Big.
Tip #4: Word Searches
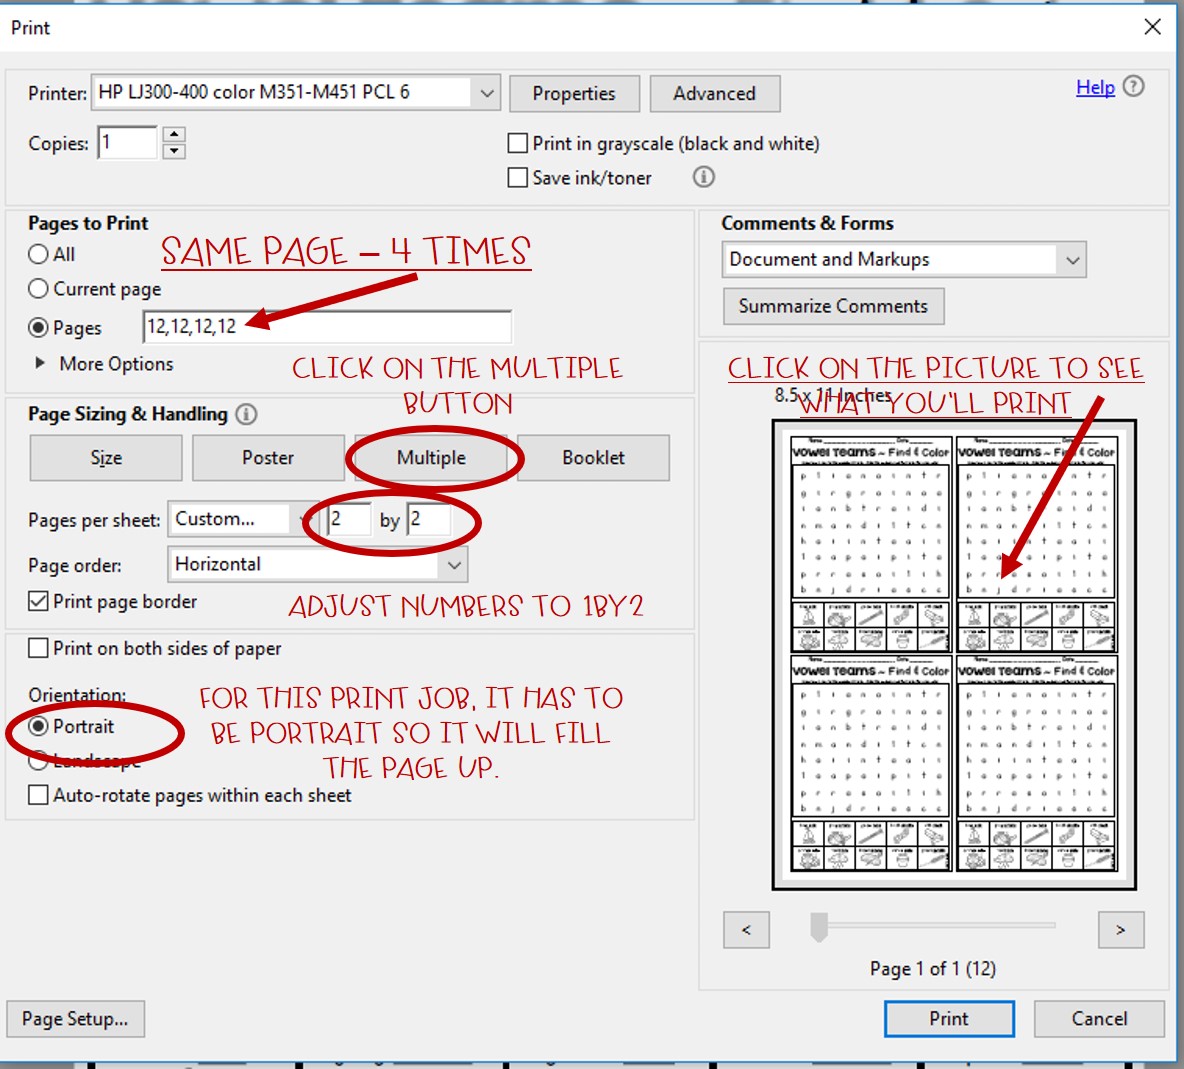
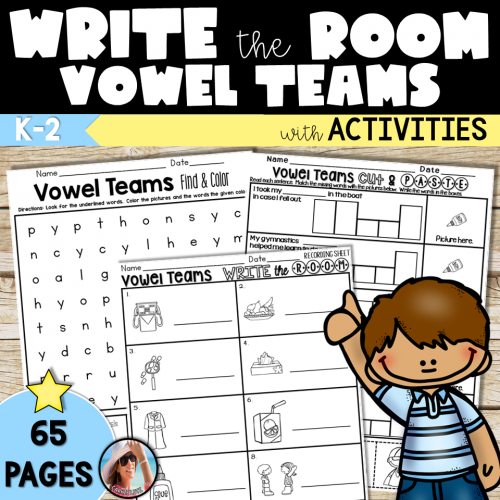
Word Searches are super fun for kids, so why not make them even more fun!? Check this out and look carefully at the printing directions for this one.

If you only want one page on the sheet repeated 4 times, make sure to look at the “PAGES” section on the print directions!
Tip #5: Posters
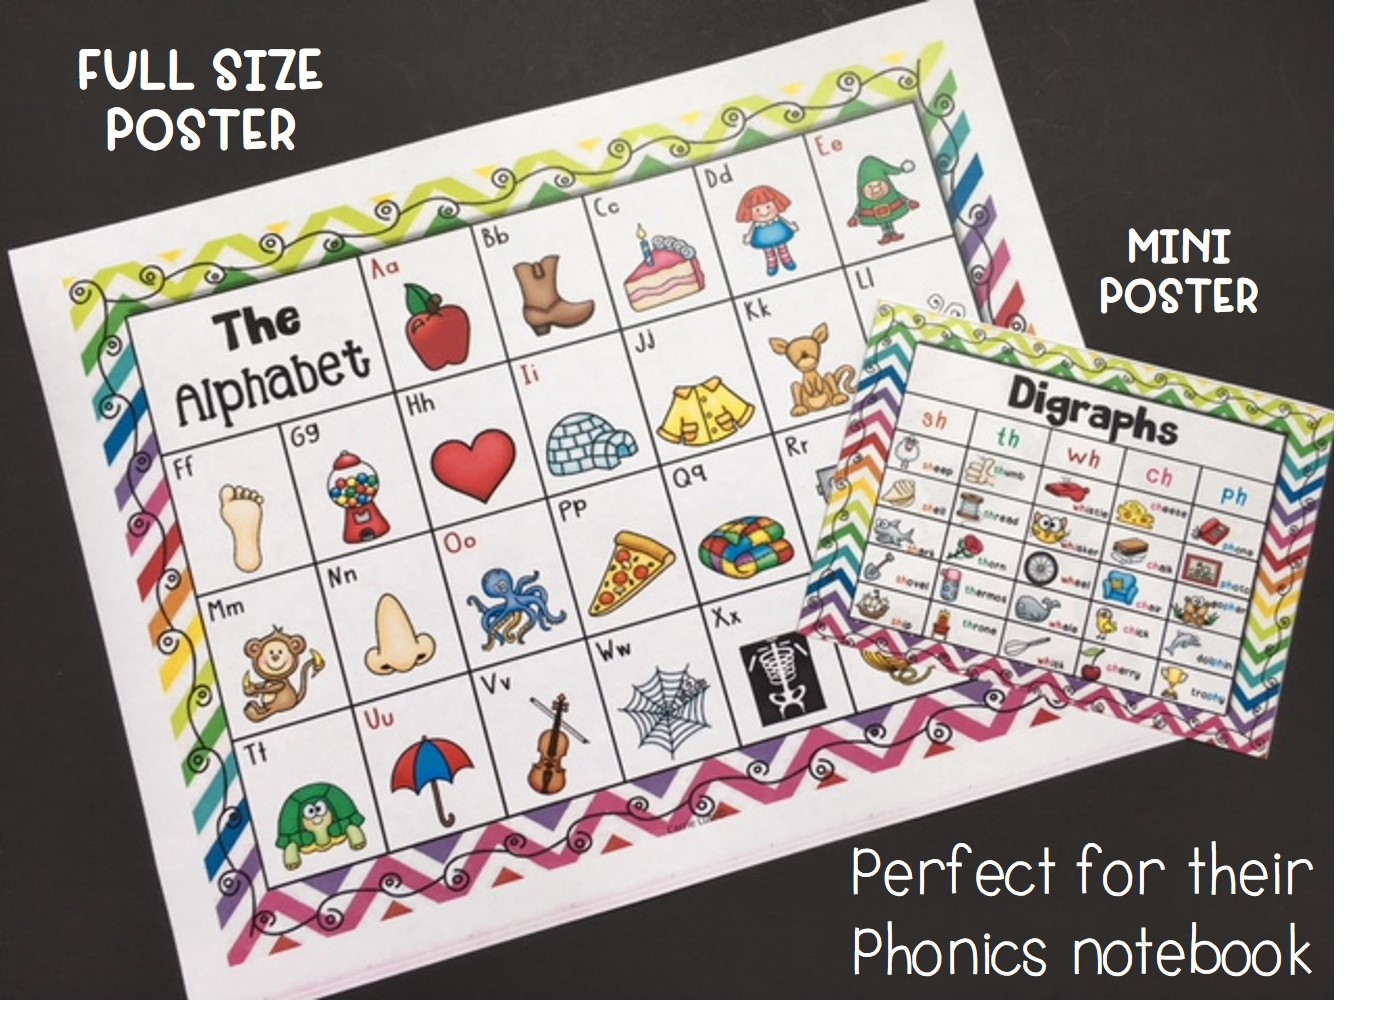
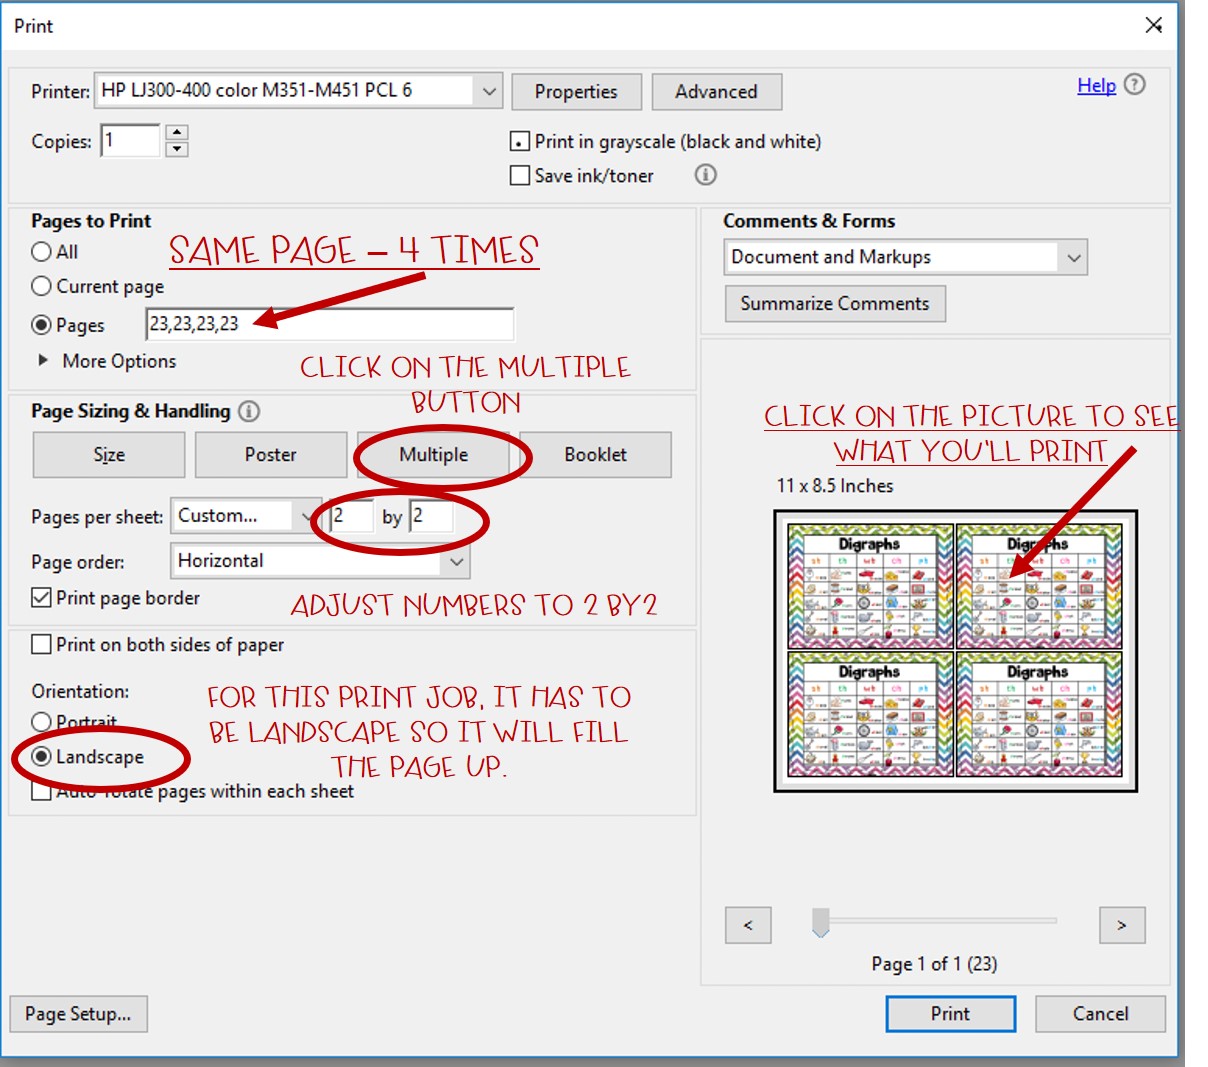
Have you ever wanted to give each of your students a helpful colorful poster to put in their Reading or Math Notebook? To do this, it would be quite expensive and full sized pages wouldn’t fit. But if you shrink them down to about 1/4 the size, it is pretty doable, even if they are in color.

Tip #6: Clip Cards
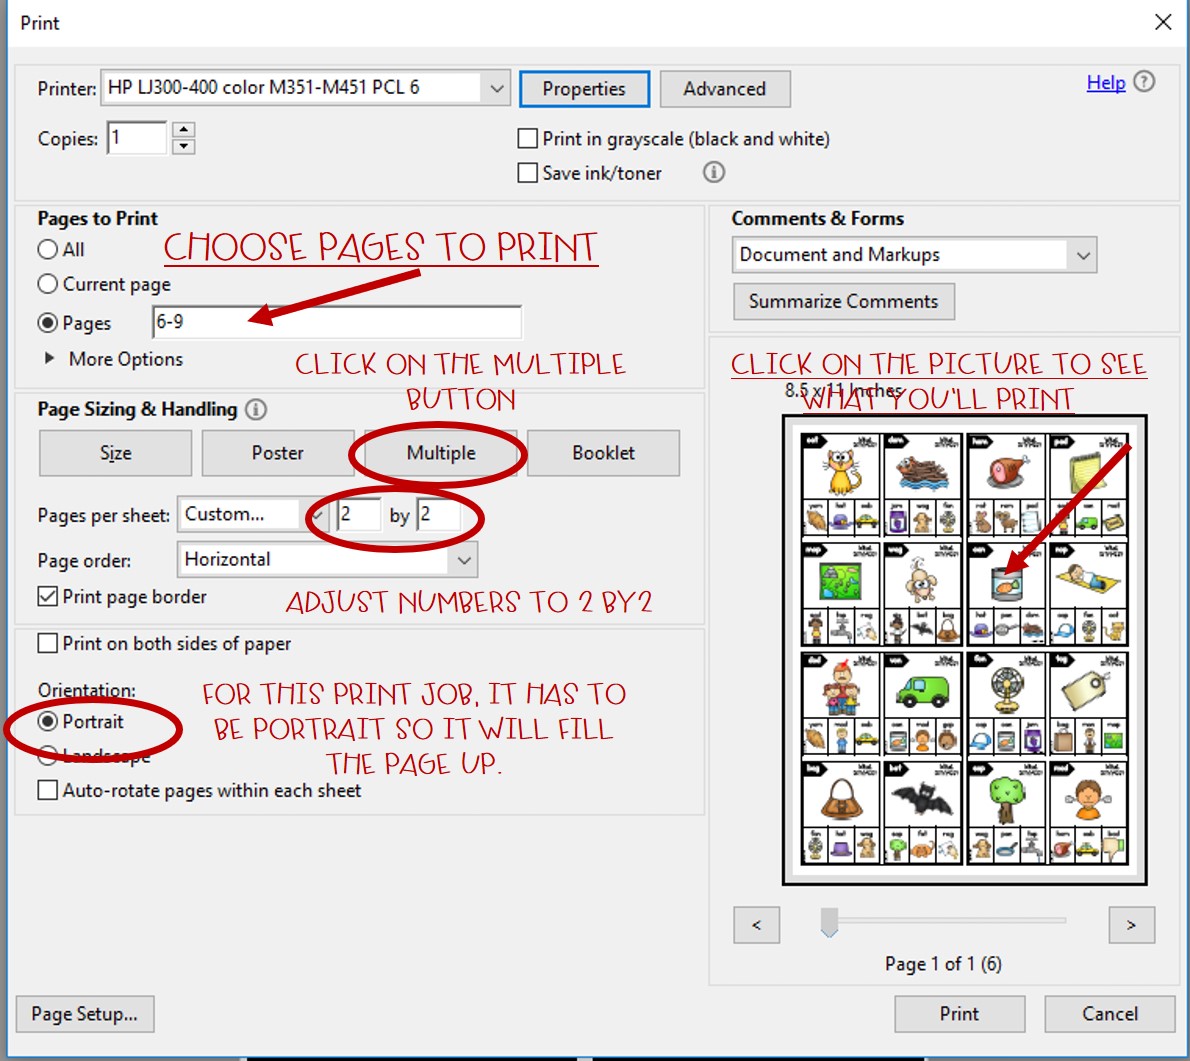
Clip cards are a fun activity for kids. Most clip cards are about 4 to 6 per page. If you make them smaller, they are super cute and the clothes pin still fits in the space. Check out these Rhyming Clip Cards.

Here are the print settings I used to make them 16 per page. That’s a big savings!

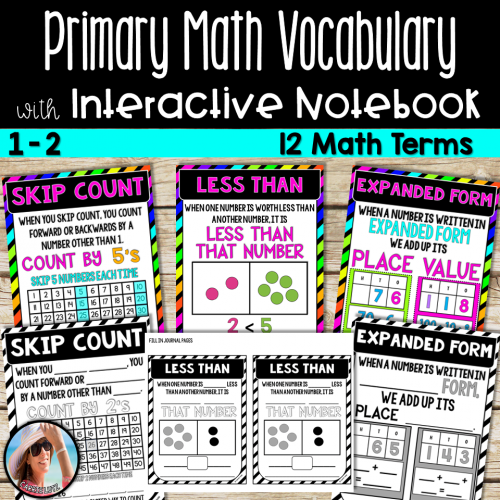
Tip #7: Interactive Notebook Inserts
Interactive notebooks are so popular and they really work great for making work interactive. It may be a stretch for some interactive notebooks, but see what you think about this…

Depending on the Math notebook you are printing, you might be able to have 4 per page, or maybe 2 per page.

Tip #8: Bingo Dabber Games
My students LOVE playing bingo dabber anything! So, if I could print half as many of the games and still keep them happy, that would be great. This worked out perfectly! I used a small paper clip on the small game and a larger one on the full sheet. The dabber sponges still worked great on the small sheet.

Here’s how to print 2 per page.


I hope you found this post on Adobe printing tips helpful, and picked-up some tricks that will save paper, ink and especially money. Don’t forget to save the image below to your Teaching Resources board on Pinterest for future use, and if you have other ideas for using the ADOBE multiple setting, please share in the comments below – I’d love to hear them!

~ Carrie
Check out more posts featuring Tips for Teachers Here!
Leave a Reply